Welcome to the very first entry in our new blog, Dig It! We figured we’d begin with the core of what we do: making compost. And where better to start than by building a batch.
Our plan is to post regularly as we follow the progress of this batch… from build and mixing, to turning and monitoring, to screening, curing and bagging… so you can see just how we do it.
So, without further ado, let’s get building…
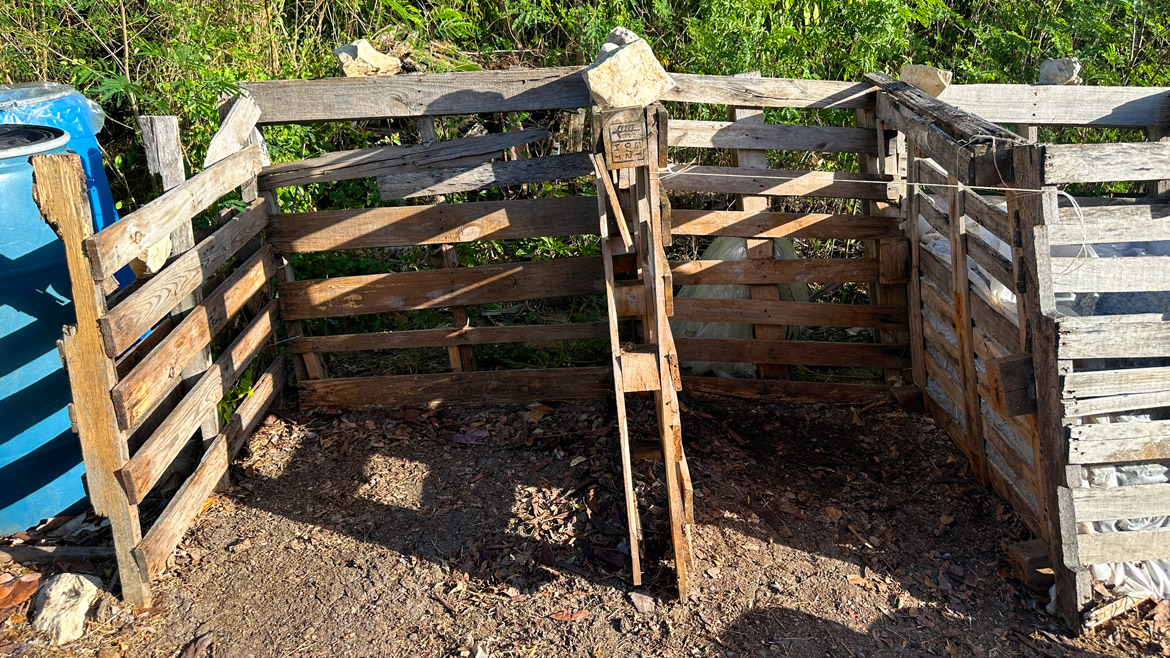
We set up our compost batches in these “bays” made from wood pallets. We have a line of fourteen bays that contain batches in various states of production. The batches are turned from one set of bays to the next, down the line, during the decomposition process.
We get the pallets from local businesses when they’ve been damaged and are no longer usable. However, they’re still useful to us! The pallets we have now were kindly donated by 2M Heavy Enterprises on Sir George Walter Highway. Thanks guys! Of course, we can always use replacements, so if your business is looking to donate your old damaged pallets to a good cause, contact us and we’ll be happy to take them off your hands.
We fill the first two bays in the line to start a batch. The reason we fill two is, the material will shrink considerably – up to 75% – during the composting process. These two bays will hold approximately three cubic yards of raw materials.
Before we start adding material, we need to line the bays with plastic sheeting. We do this for two reasons: first, we want to maintain consistent moisture levels inside the batches so the microbes can do their thing. Antigua’s hot sun can quickly dry out small batches like ours, so they need protecting. The second reason is, those same microbes that work on the batch, will also go to work on the wood pallets. So, we want to protect them as well.
Then, we make sure all of our raw materials are assembled…
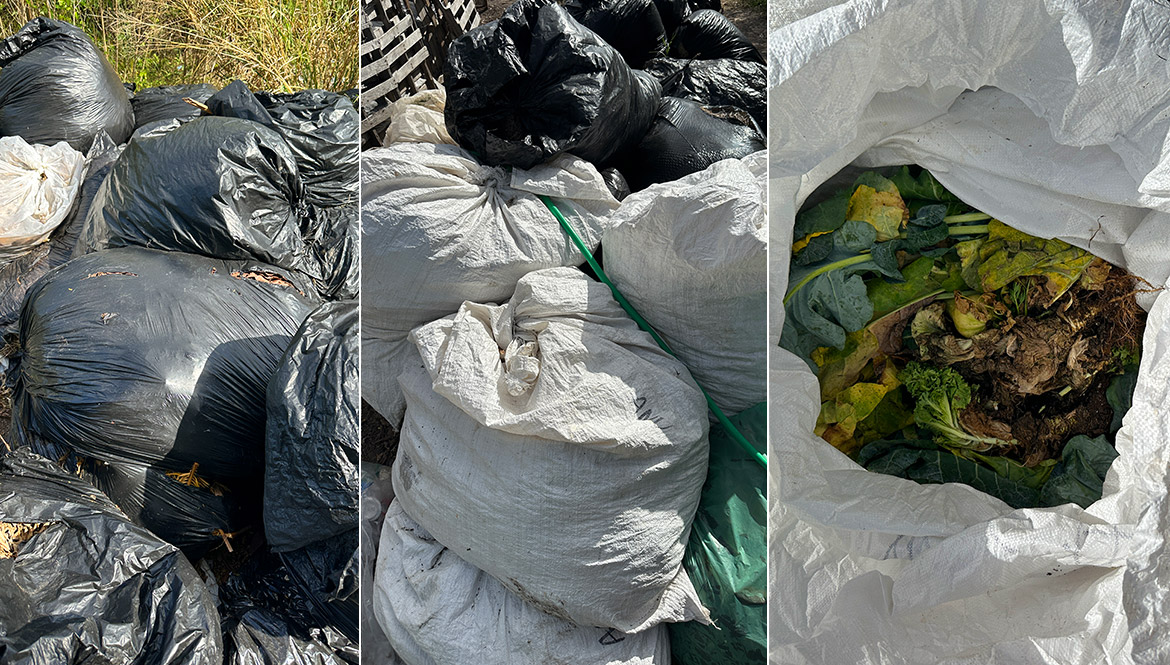
First, we have the mountain of bagged yard waste (left) that we continually pickup from residents here in Antigua. That makes up the bulk – about 90% – of what goes into the compost batch. The bags mostly contain grass clippings and raked leaves, but they will often have hedge trimmings, garden weeds, old fruit and other plant materials.
This time, we also have 5 large white yard bags (center) of leaves from our friend Lee. He does yard clearing, tree maintenance and trash removal. Contact him (268-732-3427) if you need any of these services. He does good work. And we also have a big bag of broccoli plants that my buddy Ludolph just cleared out of his garden. Thanks for those.
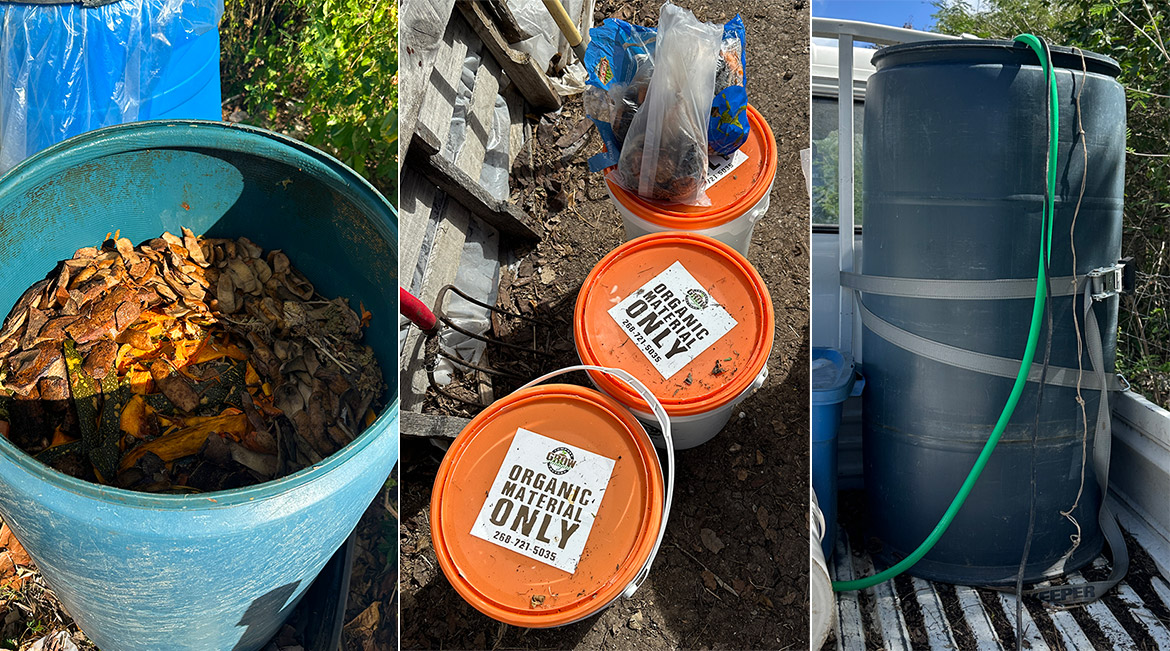
Next, we have our food waste and water. We like to have a barrel full (left) or more of food waste for each batch. Most of our food waste comes from an arrangement we have with Hodges Bay Club. We collect buckets (center) of mostly pre-consumer food waste from them, 3-5 days per week.
Also, this time we have a special addition… see those bags sitting on top of the top bucket? That’s food scraps from a nice couple of tourists from New York, Gale and Shawn. They saw us online while they were in Antigua visiting and decided to collect their food scraps and donate them. Thanks guys! And of course, we have our barrel of water (right) that we carry out in the back of the truck, as there’s no running water by our site.
Now that we have all the pieces in place, it’s time to assemble the pile.
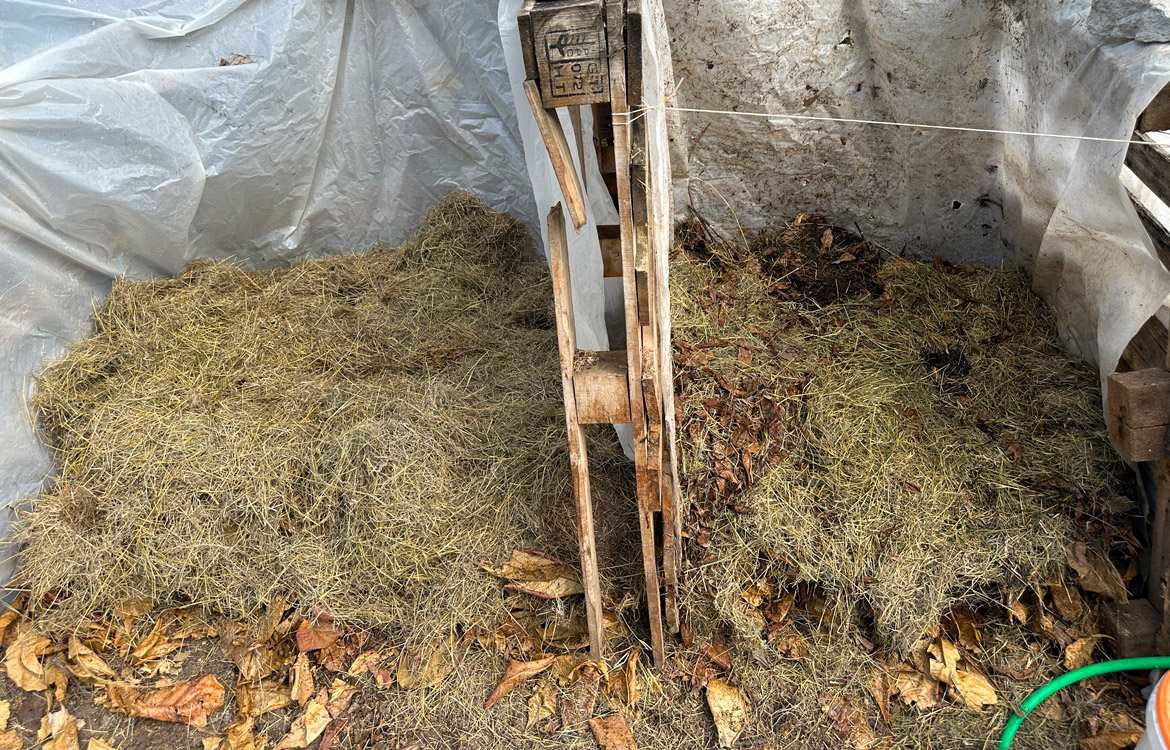
We start by layering the greens and browns – mostly grass and leaves – from the bagged residential yard waste. As we put down each layer, we wet it. Water is very important to the microbes, so we want to make sure there’s plenty of it throughout the pile. For the first 8 or 10 layers, we’ll alternate the greens and browns, until we have a solid base, then we start adding the food.
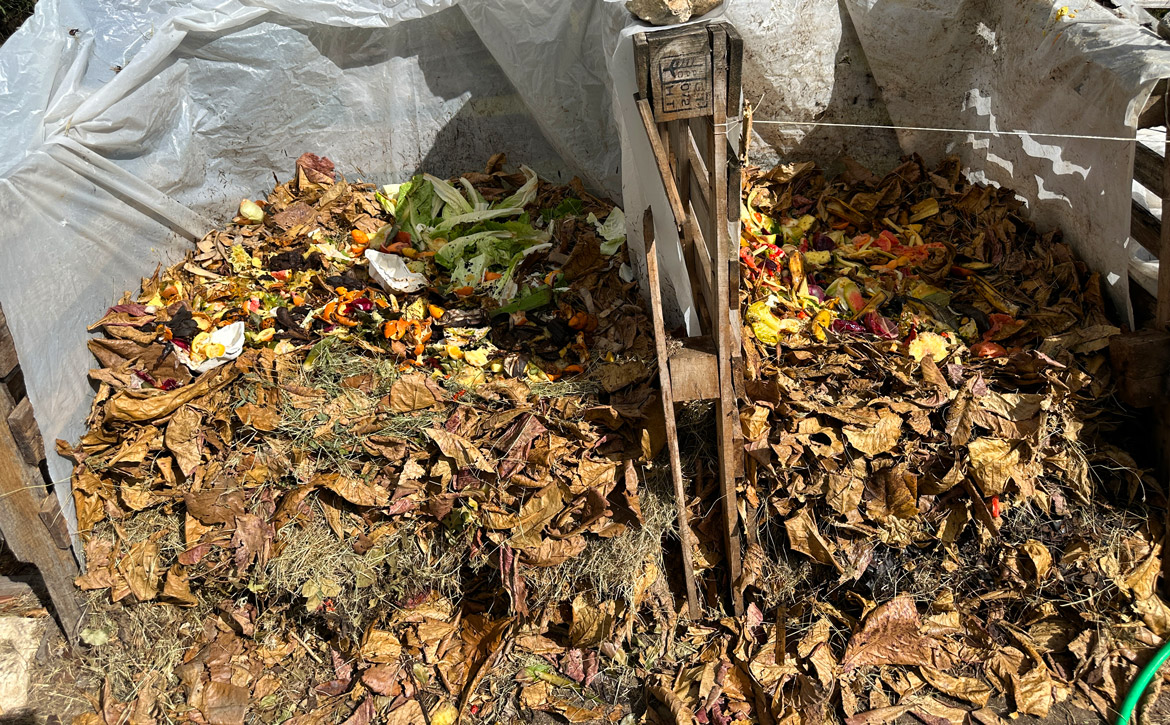
The reason we don’t add the food from the beginning is simple… pests. If food waste is exposed, it attracts critters and bugs. The way to handle that is, make sure it’s nestled inside the pile. So, the plastic protects us around the outside, and we make sure we have multiple layers of yard waste above and below. That way, the food is deep inside where it gets hot, and pests are kept at bay.
From then on, it’s brown, then food, then green, layer after layer, watering each one. Several times during this layering process, we’ll physically stand on the pile, mashing it down. This may seem counterintuitive, but it makes sense. We want the material as close together as possible, so the microbes can easily access everything, and we want to compress as much material into each batch as we can, with the small space that we have.
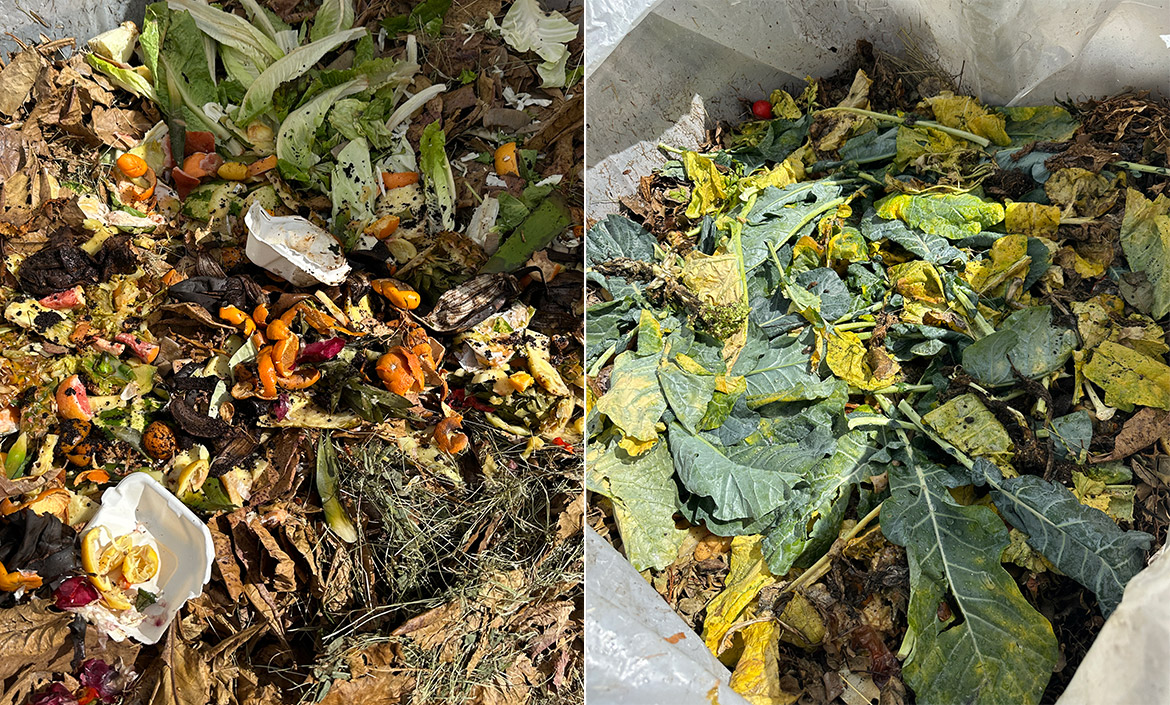
Here’s the food scraps from our tourist friends, Gale and Shawn (left), as well as the broccoli parts from our buddy Ludolph (right). Thanks again, guys!
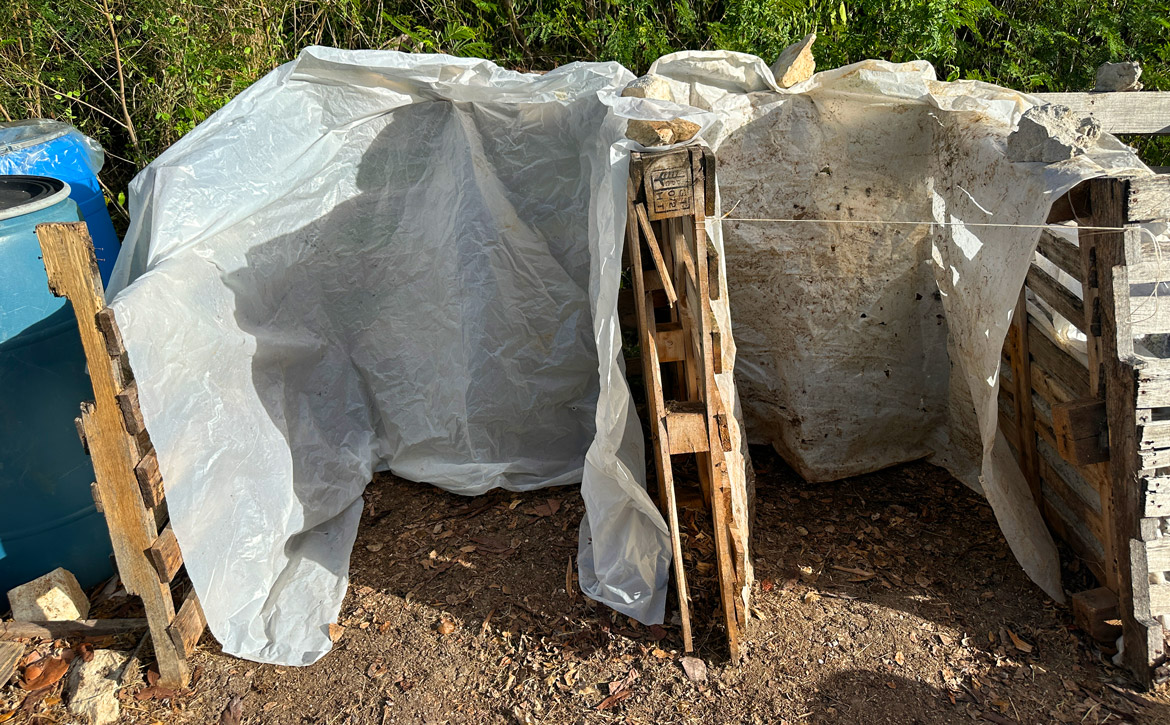
Once the batch gets tall enough, we’ll contain the material inside by tying pallets onto the front of each bay, each with a layer of plastic inside.
Eventually, the bays are filled to the top. After all the food waste has been used, as well as several times standing on the piles to compress them, and watering every layer, they’re finally ready to go.
Altogether, this batch used 26 bags of yard waste, plus the 5 big white bags of leaves from Lee, as well as the full barrel and buckets of food scraps, Gale and Shawn’s contribution, broccoli plants from Ludolph, and a full barrel of water, put together in about 3.5 hours, start to finish.
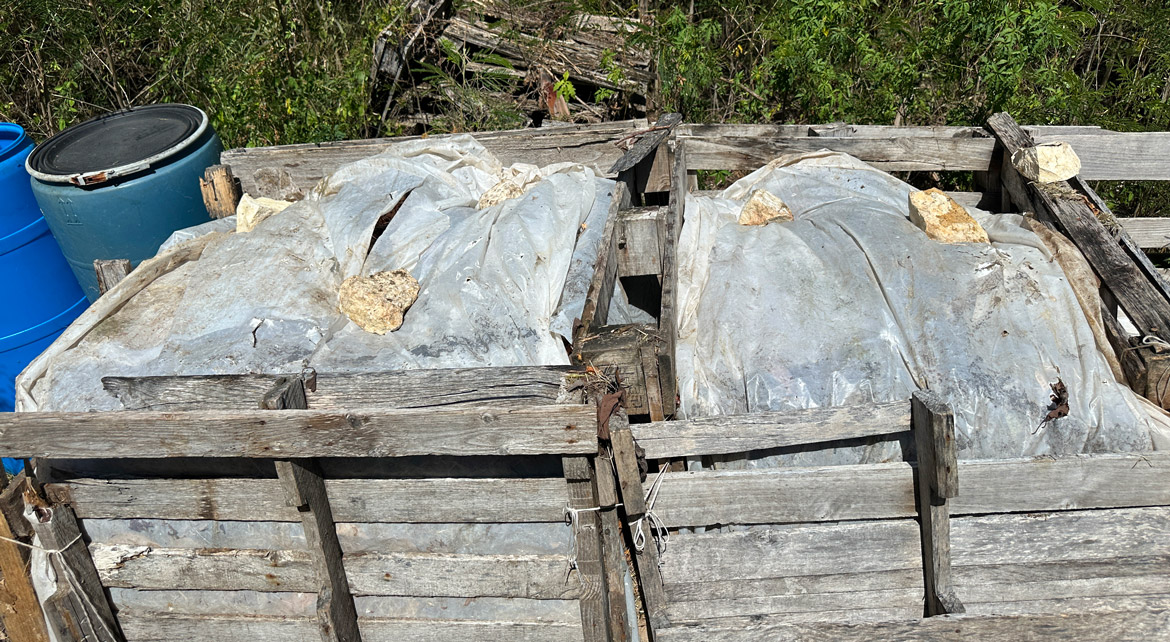
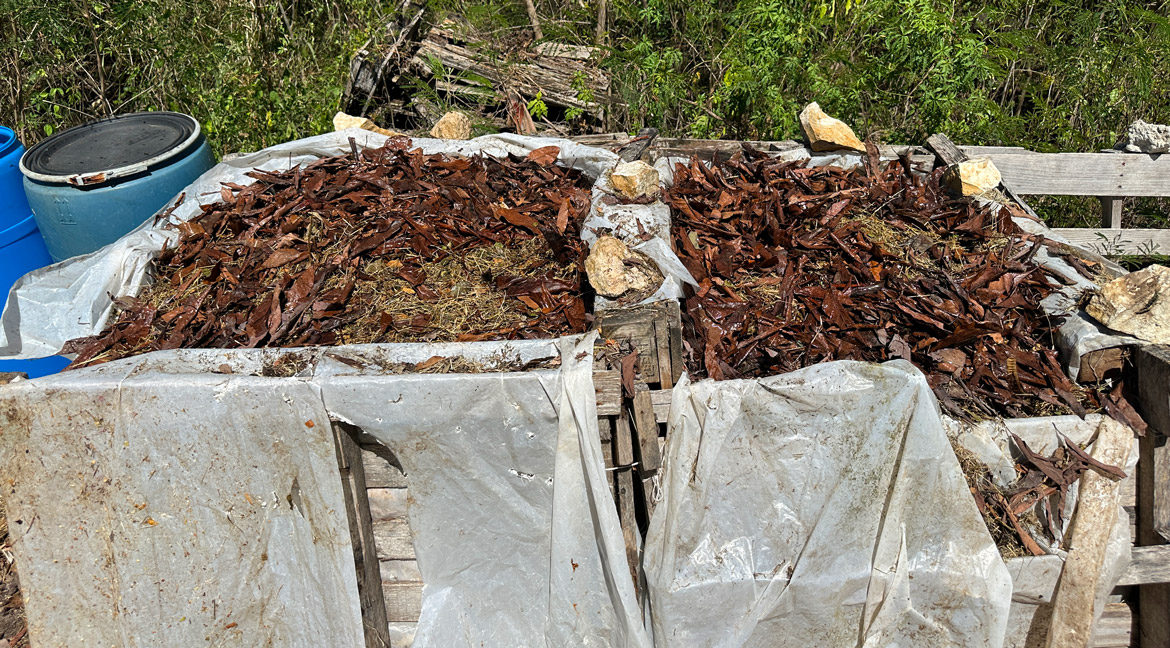
The remaining plastic from the sides and the front is wrapped over the top to close them up. We place rocks on top to help with the initial compression, as well as to hold the plastic in place. Now, it’s all about patience, and letting those microbes go to work. In about ten days or so, we’ll be ready for the first turn. Until then we monitor and wait.
Next up:
Monitor mode. Keep an eye on temperature, moisture, and smell, and check back in once this batch starts heating up.